Wednesday 16 December 2009

CakePHP and Oracle on CentOS. My own how to guide

During the last couple of days I formated and set up from scratch my CakePHP development server, using CentOS, php 5.3 from Remi and the Oracle 11gR2 clients. The log of my actions in PDF can be downloaded from here.

During the following days I will setup one more server -- supposed to be the one that we will use productively -- following these same instructions. If I find any mistakes I will correct them and post back the orginal file here.

Update history

  • Dec-28-2009: Added information about setting up and running the cake scripts from the command line.
  • Jan-21-2010: Verified contents on a new installation and added reminder for configuring the firewall.

Tuesday 15 December 2009

CakePHP: A behavior for acessing non UTF Oracle databases

The origins of our company's Oracle database date back at the beginning of the decade. At that time we had Oracle version 9i running on SuSE Linux 8.2 and the expected thing to do back then was to create a database using the EL8ISO8859P7 character set. After eight years we are still using Oracle. Now the database is 11g and the database server is OEL 5.4. Basic data structures however, are still the same as they were back in 2002.

During the evaluation of CakePHP as our next development environment we very soon run into the problem of trying to insert and retrieve Unicode data from a non-unicode database. Since the encoding key of $defualt array member of the DATABASE_CONFIG class (stored in app/config/database.php file) has no effect when connecting to Oracle databases, we ended up creating an additional translation layer, that would convert data to and from Unicode when reading from and writing to Oracle.

CakePHP's way of doing this kind of staff is to create behaviors. Ours is called CharsetConverter, so by CakePHP's standards it is implemented in a class named CharsetConverterBehavior that is stored in a file named charset_converter.php which is located in the APP/models/behaviors directory.

The approach here uses the mb_convert_encoding function provided with the php-mbstring package. The code implementation is the following

<?php
/**
 * A simple behavior that allows cake PHP to use single byte Oracle
 * and possibly other vendor -- databases
 * Tested with Oracle 11gR1
 *
 * @version 0.1
 * @author Thanassis Bakalidis
 */
class CharsetConverterBehavior extends ModelBehavior {
    // we have an Oracle database that dates back to 2002 so
    const DEFAULT_DB_LOCALE = 'ISO-8859-7';
    const DEFAULT_PAGE_LOCALE = 'UTF-8';

    const READING_FROM_DB = TRUE;
    const WRITING_TO_DB = FALSE;

    var $databaseLocale;
    var $webpageLocale;
    var $Model;

    function setup(&$model, $settings=array())
    {
        $this->Model = $model;

        $this->databaseLocale = isset($settings['databaseLocale']) ?
                                    $settings['databaseLocale'] :
                                    self::DEFAULT_DB_LOCALE;
        $this->webpageLocale = isset($settings['webpageLocale']) ?
                                    $settings['webpageLocale'] :
                                    self::DEFAULT_PAGE_LOCALE;
    }

    /**
     * Change the query where clause to the datbase native character set.
     */
    function beforeFind( &$queryData, $queryParams)
    {
        if (!isset( $queryParams['conditions']))
            return $queryParams;

        $queryParams['conditions'] = $this->recodeRecordArray(
                                                        $queryParams['conditions'],
                                                        self::WRITING_TO_DB);
        return $queryParams;
    }

    /**
     * Convert fetched data from single byte to utf-8
     */
    function afterFind(&$model, $results, $primary)
    {
        return $this->recodeRecordArray($results, self::READING_FROM_DB);
    }

    /**
     * Convert data to be saved into the database speciffic locale
     */
    function beforeSave()
    {
        $this->Model->data = $this->recodeRecordArray( $this->Model->data,
                                                       self::WRITING_TO_DB);
        return true;
    }

    /**
     * Recursively traverse and convert the encoding of the array passed
     * as parameter.
     */
    function recodeRecordArray(&$recordArray, $loading = TRUE)
    {
        foreach( $recordArray as $key => $value)
            if (is_array($value))
                $recordArray[$key] = $this->recodeRecordArray($value, $loading);
            else {
                if (is_numeric($value))
                    continue;
                $recordArray[$key] = $loading ?
                                    mb_convert_encoding(
                                                $value,
                                                $this->webpageLocale,
                                                $this->databaseLocale)
                                    :
                                    mb_convert_encoding(
                                                $value,
                                                $this->databaseLocale,
                                                $this->webpageLocale);
            }
        return $recordArray;
    }
}
?>

Once we have this in place, using the new behavior in one of our models is as simple as setting the correct value of the $actAs variable. Here is a simple example of a model using the Character set convention and validation.

<?php
    class Task extends AppModel {
        var $name = 'Task';
        var $actsAs = array(
                    'CharsetConverter' => array(
                                            'databaseLocale' => 'ISO-8859-7',
                                            'webpageLocale' => 'UTF-8'
                                        )
                    );
        var $validate = array(
                    'title' => array(
                                'rule' => 'notEmpty',
                                'message' => 'Task title cannot be left blank'
                    )
                );
    }
?>

Almost all applications contain more than one model. Perhaps the best place to put the $actAs definition would be the AppModel class defined in the file app_model.php in the root of your app directory

I also understand that writing a behavior to accomplish the job of the database driver is not the best solution. Since I have nothing better for the moment, I guess I will have to start every new CakePHP project by first changing my app_model.php file.

Tuesday 1 December 2009

How to set up the SAPRFC extension for PHP on CentOS 5

SAPRFC

SAPRFC is an extension module for PHP 4 and 5, that makes it possible to call ABAP function modules running on a SAP R/3 system from PHP scripts.

I always wanted to test how SAP's remote function calls work together with PHP and since I am already evaluating CakePHP as our next development platform, I decided that the occasion was right to give it a try.

Next thing I did was to get my hands on The SAP Developer's Guide to PHP book by Craig S. Cmehil, which is an $85 cost and 98 page long (indexes included) tutorial on how to set up and use SAPRFC for PHP. Unfortunately the second chapter that discusses setting up your development system focuses mainly on Windows, so this post will contain the steps I took to set up SAPRFC for PHP on my x86_64 CentOS 5.4 server.

Package Requirements and Downloads

To get the latest PHP packages for Enterprise Linux I have used Remi's repository.

# wget http://download.fedora.redhat.com/pub/epel/5/x86_64/epel-release-5-3.noarch.rpm
# wget http://rpms.famillecollet.com/enterprise/remi-release-5.rpm
# rpm -Uvh remi-release-5*.rpm epel-release-5*.rpm

Remi's packages depend on the EPEL repository, so I am posting the installation procedure for EPEL as well. (if you haven't installed it yet, now will be a good time to do so.)

In addition to any other PHP packages that your application requires, in order for the SAPRFC to compile correctly, you will also require the php-devel package.

Next thing is the SAPRFC package itself. The method to install it will be to build the saprfc extension as a dynamic module without rebuilding PHP. (Remi has already done that for us.) The package itself can be downloaded from here.

Continue by installing SAP's Non Unicode RFC SDK version 6.20 or 6.40. This must be downloaded directly from the SAP Service Support Portal. You will need a customer SAP support ID

Be advised however, that SAP has implemented some form of a DNS transparent cluster for their WEB service, so each time you log in there, you end up accessing a server with a different DNS name (something like https://websmp104.sap-ag.de/support). That means that your browser will not be able to store your credentials because every time you attempt to connect to https://service.sap.com/support, the DNS name changes so it pops up a dialog asking for login data again and again... Perhaps this is SAP's way of implementing the ultimate security system but, as far as I can say it is very annoying.

Anyway, once you are there select "Download" from the top menu. Next click "Search on all categories" from the left menu and enter RFC SDK on the search box that appears. You will be given the chance to select SAP RFC SDK 6.40 from the results page. Be careful not to choose the UNICODE version. Select Linux on x86_64 64bit from the list of architectures and you will end up with an SAR file in your download basket. Now you can download it

There is one more problem though. The file you download is of type SAR. meaning SAP Archive. In order to unpack it you will need SAPCAR, SAP's unpacking program. You download this the same way you downloaded RFCSDK -- just type SAPCAR on the search box. Only thing is that the Linux x86_64 version does not run on CentOS. You will need to download a Windows version, unpack the archive on a Windows machine and then upload it again on you Linux system. At least that is what I had to do. (From what I was able to understand SAP's SAPCAR for Linux is compiled to run under SuSE, so if you have satch a machine, you can try unpacking the archive over there...)

Installation

So now let's assume that you have placed SAP's RFC SDK under /opt/SAP/rfcsdk and SAPRFC extention module for PHP under /usr/src/saprfc-1.4.1/. Type the following commands on your shell prompt or add them at the end of your startup file. (I put them in /etc/profile.)

# SAP RFC SDK
export SAPRFC_DIR=/opt/SAP/rfcsdk/
export PATH=$SAPRFC_DIR/bin:$PATH

If necessary, log out and back in again. Now move to the SAPRFC extension for PHP directory and issue the phpize command. This will create the configure script that needs to be run next. After configure completes, run make and make install (as root) to finish installation. When everything finishes the file saprfc.so will be placed in your /usr/lib64/php/modules folder. Open you php.ini file located in /etc and add a line line

extension=saprfc.so

in the Dynamic Extensions section, save it, restart http server and you are ready to go.

[root@barbara ~]# service httpd restart
Stopping httpd:                                            [  OK  ]
Starting httpd:                                            [  OK  ]

Verification and testing

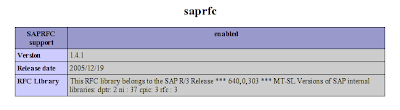
The very first check will be as simple as looking at the saprfc section of your phpinfo() page. You should be seeing something like :

The next thing will be to write an actual program that does something more practical like connecting to an SAP R/3 system and fetching back some useful data. Since this already a rather lengthy post, I will prepare and provide a test program some time later.

One last comment: It took me a while to figure that out. All examples that come along with the SAPRFC module for PHP, as well as the examples on the "SAP Developer's Guide to PHP" book, use <? instead of <?php to introduce php code. This is going to give you a lot of trouble when attempting to use these files with php 5.3.1 so before trying anything else, go to the files in the installation directory -- especially saprfc.php that you will always include -- and perform the necessary changes.

Friday 27 November 2009

Enterprise class hardware for Enterprise class software

We wanted to set up a portable LAMP server for a home project we are playing with and there it is :

Since the little monster uses two SD cards as hard drives, it takes around four minutes to boot, but once it does boot, then its 900MHz Celeron CPU with its 1GB of RAM can stand up against a multi-threaded Java program gathering information from the local Ethernet and a complete Apache, PHP and MySQL server accessed for reporting.

Only thing is that the book is almost three times thicker than the machine.

Thursday 26 November 2009

SAP: All the little text tables

Even after 5 years of tampering with ABAP, I still have problems getting used to the way SAP name their production tables. All those four letter German abbreviated names are explanatory enough to scare away any newcomer. Even the English descriptive texts that SAP provides along with each object are so Spartan, that I very seldom can make any good use out of them.

Luckily enough, I have just the right person available who seems to know all the four -- or five -- letter permutations that yield SAP table and field identifiers. (Thanks again Marilena), so today I am going to steal a few of her knowledge and give us code fragments that show how to get descriptive texts for various material and production related key's like material names, groups, blocking statuses, MRP controllers, etc.

We will start with the names of storage locations. The field and the data type for those are named lgode. The table that stores related info is t001l.

   DATA :
     storage_location TYPE lgort_d, 
     storage_location_name TYPE lgobe.

    " storage_location = '...'.
    SELECT SINGLE lgobe
      INTO storage_location_name
      FROM t001l
      WHERE lgort = storage_location.

The next one is easy. Even I know by heart how to get the material description given the material number, but I will put it down anyway. The thing to mention however, is that most SAP text tables are language dependent, so to get the text for the key, you also need to specify the language

    DATA :
      material TYPE matnr,
      material_descr TYPE maktx.

    " material = '...'.
    SELECT SINGLE maktx
      INTO material_descr
      FROM makt
      WHERE matnr = material
        AND spras = sy-langu.

Material types are stored in table t134t which is also language dependent.

    DATA :
      material_type TYPE mtart,
      material_type_descr TYPE mtbez.

    " material_type = '...'.
    SELECT SINGLE mtbez
      INTO material_type_descr
      FROM t134t
      WHERE mtart = material_type
        AND spras = sy-langu.

Our next table is t141t, that stores the various texts for the material blocking statuses.

    DATA :
      mat_blocking_status TYPE mstae,
      mat_blocking_status_descr TYPE mstb.

 " Material blocking status descriptions
    SELECT SINGLE mtstb
      INTO mat_blocking_status_descr
      FROM t141t
      WHERE mmsta = mat_blocking_status
        AND spras = sy-langu.

We wil now move to the inspiringly named t023t table, that provides access to the short and long names of material groups.

    DATA :
      material_group TYPE matkl,
      mat_group_short_descr type wgbez,
      mat_group_long_descr TYPE wgbez60.
    
    " material_group = "...".
    SELECT SINGLE wgbez wgbez60
      INTO (mat_group_short_descr, mat_group_long_descr)
      FROM t023t
      WHERE matkl = material_group
        AND spras = sy-langu.

Product hierarchy descriptions are found in in t179t.

    DATA :
      mat_hierarchy TYPE prodh_d,
      mat_hierarchy_descr TYPE vtext.

    " mat_hierarchy = '...'.
    SELECT SINGLE vtext
      INTO mat_hierarchy_descr
      FROM t179t
      WHERE prodh = mat_hierarchy
        AND spras = sy-langu.

Table t438t stores MRP type descriptions.

    DATA :
      mrp_type TYPE dismm,
      mrp_type_descr TYPE disbez.

    SELECT SINGLE dibez
      INTO mrp_type_descr
      FROM t438t
      WHERE dismm = mrp_type
        AND spras = sy-langu.

Last table for today's post will be t024d. this one contains MRP Controller descriptions and is not language but plant organized.

    DATA :
      plant TYPE werks_d,
      mrp_controller type idspo,
      mrp_controller_descr TYPE disnam.

    SELECT SINGLE dsnam
      FROM t024d
      INTO mrp_controller_descr
      WHERE dispo = mrp_controller
        AND werks = plant.

... and that is enough for one day.

Thursday 12 November 2009

The CakePHP manual in PDF

if anybody wants a PDF version of the entire CakePHP manual as it appears in http://book.cakephp.org/, the book is available from here.

I created this document by copying and pasting text from the book website into an OpenOffice text document, because I wanted to have something to print and browse like a normal book. I have also added a few Oracle specific instructions. It is therefore possible, that some things may have slipped me. I will try and change this document every time I find an error or add a correction. Please feel free to post any mistakes you may find.

Last uploading: January 5-2010

Saturday 31 October 2009

How to split a music file (flac, wv ...) when given the corresponding .cue file.

This is the second time I needed to do this, so instead of googling again, I thought that I may post it here for future reference .....

Thanks to fl_bulgarelli from the Fedora Forum here is a small how to, when somebody gives you a complete album encoded in flac and a the corresponding .cue file, while what you want is to be able to split the album into smaller music files corresponding to the songs.

The magic command is:
cuebreakpoints album.cue | shnsplit -o flac album.flac
or
cuebreakpoints album.cue | shnsplit -o wv album.wv if you are using a wavpak file.

More details about how to set this up, can be found here. For the shake of completeness I will add that as of this writing (August 20th 2011) both the cuetools and shntool packages are available from the main fedora repository, so a simple yum install shntool cuetools, will work just fine. For Ubuntu, Mint etc try sudo apt-get install cuetools.

NOTE: For those with a bad attitude towards typing sh commands, try opening the .cue file with k3b. A few clicks and (perhaps) a visit to your distro's Add/remove Software application might get you to splitting your flac file as well :).

Tuesday 29 September 2009

Fedora: Using and authenticating yum through a proxy

I have just finished a Fedora 11 installation here at the office. We needed a test bed for working with symfony and our EL machines did not provide php 5.2.

Next thing was to update the new machine and install additional software and that meant being able to go through a squid proxy server, that requires authentication.

A little bit of digging and the magic man yum.conf revealed the following :

Edit /etc/yum.conf and add the following lines:

proxy=http://proxy.domain.local:port
proxy_username=your_user_name
proxy_password=your_password

Needless to say that the same configuration works perfectly on CentOS 5.4 ...

When your machine is behind a proxy then, in order for many other programs -- like wget -- to function correctly, you also need to export the http_proxy variable. The correct format for it is :

export http_proxy=http://username:password@proxy.domain:port

Friday 11 September 2009

Javascript : Yet an other email address validator.

I was building a Conduct us page the other day and run into the need for a JavaScript e-mail validator. I googled around a bit only to discover that the approaches were so many that I didn't know which one to choose.

So, eventually I did what every hard headed person would do, I sat down amd wrote my own validateEmail function. The code is a merge of ideas coming from the fifth edition of Tom Mergino's and Dori Smith's JavaScript for the World Wide Web, and Anita Sudhakar's approach from SmartWebby.

The resulted code looks like the following :

function validateMail(str)
{
  var at = "@";
  var dot = ".";
  var atPos = str.indexOf(at);    // position of '@' in the string
  var stringLength = str.length;  // position of '.' after the '@'
  var dotPos = str.indexOf(dot, atPos);
  var invalidChars = "~`/!#$%^&*()+={}[];:";
  var i;
  var badChar;

  // Step 1 Do not allow blank emails
  if ( str == "")
    return false;

  // Step 2 Make sure that the address does not contain invalid characters
  for (i = 0; i < invalidChars.length; i++) {
    badChar = invalidChars.charAt(i);
    if (str.indexOf( badChar) > -1)
      return false;
  }

  // Step 3: Make sure that the @ character is present and
  // that is not the first or the last character of the
  // email address string.
  if (atPos == -1 || atPos == 0 || atPos == stringLength)
     return false;

  // Step 4: Likewise make sure that a dot character exists and that
  // the distance between the @ and . is at least two characters apart
  if (dotPos == -1 || dotPos + 3 > stringLength)
      return false;

  // we have passed all tests let's hope that the email is valid
  return true;
}

The function should be called from an other function that will retrieve that value of an email filed and test it during form submit. A typical usage would be :


function validateEmailField( fieldID)
{
  var emailField = document.getElementById( eMailFieldID);
  var status = false;

  if (validateMail(emailField.value))
    status = true;
  else
    alert('Invalid email!');
  
  return status;
}

Friday 4 September 2009

Windows: The ultimate way to get rid of stuck print jobs.

Sometimes print jobs get stuck for good. Users try to delete them and then the entire queue gets stuck too. I have many times tried to find a remedy for that and even attempted to reboot the Windows server in question without always achieving the desired result. Lately, my eyes were opened by a friend who showed me they way by following the steps shown below.

  1. Stop the Print Spooler service.
  2. Delete all files from %SystemRoot%\system32\spool\PRINTERS/.
  3. Start the Print Spooler Service again.

... and that does it.

Wednesday 2 September 2009

Windows: Shutting down machines remotely

I have many times heard people complain about Windows machines freezing or being very slow to respond. The problem sometimes is so bad that not even the desktop user is able to close frozen applications or even shutdown her own machine. The remedy for 99% of all these cases, thank you Microsoft, -- as Mark Minasi would have said -- is the notorious shutdown command.

This posting will contain a brief overview of the command syntax. This command has been around since the days of Windows NT4 but Microsoft has changed it and now in Windows 2003 environments the arguments are not the same

So, to begin with the oldest version for those of us still stuck with NT4, the syntax for this platform is like this

shutdown \\machine_name /r /t:10 "Machine is going down in 10 seconds" /y /c

You can also use the /l switch to force a local shutdown. The /c, shown above, is very useful since it forces all running applications to close. The -t:N will display a message notifying the user that their machine is going down in N seconds. Here you can also provide an additional string explaining the reasons for the reboot, enclosed in double quotes. Finally if you forget the /r then the machine will just shutdown and then you 'll have to walk over there and power it down -- remember, this is NT4 we 're talking about -- and then up yourself. If after all you change your mind and you decide that the machine does not need to reboot, then -- if there is still enough time left -- use the command shutdown \\machine_name /A to abort the shutdown process.

Now with Windows 2003 the shutdown command has changed quite a bit. The equivalant command to shutdown a remote system now looks like this:

shutdown /r /m \\machine_name /t 10 /f /c "Machine is going down in 10 seconds"

The order of the arguments is significant. The /r switch can be replaced with /s to shutdown or /a to abort a shutdown in progress. The /t and the time interval are now separated by a space instead of a column ':' character. The /c switch now introduces the message for the shutdown reason and finally /f is now used to force closing of all running applications.

Shutdown for Windows 2003 has also an additional /d [p:]xx:yy switch that allows you to specify a coded reason for the shutdown, in exactly the same way you do when shutting down a Windows 2003 server via the GUI. The shutdown help screen provides detailed code listings about the meaning of each code. I never use them from the command line, so my most often issued command looks like this :

shutdown /r /m \\pc-bakalidis /t 0 /f 

Tuesday 1 September 2009

CentOS: Problems updating python

I have been running into the same problem while trying to update my 5.3 CentOS machine.

Yum reported three packages that needed update :

 java-1.6.0-openjdk     x86_64     1:1.6.0.0-1.2.b09.el5      updates      27 M
 libxml2-python         x86_64     2.6.26-2.1.2.8             updates     713 k
 python                 x86_64     2.4.3-24.el5_3.6           updates     5.9 M

When yum update was issued however, the same error message kept popping up.

--> Missing Dependency: /usr/lib64/python2.4 is needed by package
libxslt-python-1.1.17-2.el5_2.2.x86_64 (installed)

I tried disabling almost all my repositories, I removed many packages, almost ended up un-installing half my entire and then I googled on it. As always,, the answer was right there in front of me. Frank Cox wrote on the CentOS mailing list:

yum clean all
yum update

And that works. Thank you Frank.

Friday 12 June 2009

Linux: Safely deleting .rpmnew files

Just got on my hands on the new Fedora 11 today. I have to admit that I didn't get a chance to explore all the new things that Leonidas has brought along.

For starters, the feature that amazed me was the preupgrade script that magically downloaded everything, installed it and even changed my repos to point to correct ones for Fedora 11. And when I say repos, I do not mean only the basic ones, but also livna and RPM Fusion.

So the next thing that I had in my mind was to check all the .rpmnew files installed in my system and determine what was needed, so I started doing a search with a command like find / -name *.rpmnew -print, I ended up using diff and deleting the .rpmnew file that was identical to the original.

After comparing /usr/share/config/colors/Royal.colors.rpmnew, /usr/share/config/colors/40.colors.rpmnew, /usr/share/config/colors/Web.colors.rpmnew and /usr/share/config/colors/Rainbow.colors.rpmnew with their original versions and deleting all four of them, I decided that a little script could save me quit a lot of trouble. So after a little bit of digging I ended up with the following code:

#!/bin/bash

# Locate all *.rpmnew files in your system and compares them with the 
# original files without the rpmnew extention. 
# Files are then compared using diff. If their contents are the same, then
# the .rpmnew version is removed.

RPM_NEW_LIST=`find / -name "*.rpmnew" -print 2>/dev/null`

for RPMNEW_FILE in $RPM_NEW_LIST
do
    # Get the file without the .rpmnew extention
    ORIGINAL_FILE=${RPMNEW_FILE%".rpmnew"}
    # Compare it with the original
    DIFFERENT=`diff $RPMNEW_FILE $ORIGINAL_FILE`
    # If diff's answer is not empty ...
    if [ -n "$DIFFERENT" ]; then
        echo "Please examnine files $ORIGINAL_FILE and $RPMNEW_FILE "
    else
        # File is safe to remove
        # rm -f -v $RPMNEW_FILE
        echo "$RPMNEW_FILE file can safely be removed." 
    fi
done

I run this script as root on both my Fedora and CentOS 5.3 machines The simple version I have here will show you the files that are safe to delete and the files need your attention. If you like, you can uncomment the rm -fv line at the end of the script, but I would strongly advice against it.

Note: Sometimes rpm leaves out .rpmsave files as well so, if you are really into cleaning up your system, it is wise to search for these files also.

Sunday 3 May 2009

Linux: File containing active DHCP leases

  • On openSUSE systems this is located in /var/lib/dhcp/db/dhcpd.leases
  • On CentOS the leases file is in: /var/lib/dhcpd/dhcpd.leases

As soon as I find out what goes on on other systems, I 'll make new entries as needed.

Thursday 16 April 2009

Oracle 11g: Switching to native compilation

One of the most celebrated features of Oracle 11g is supposed to be the PL/SQL native compilation feature. This allows PL/SQL code to be compiled directly into machine code that is also stored inside the database, thus eliminating the need for an external C complier of DLL loader.

Sam R. Alapati and Charles Kim in their Oracle Database 11g New Features for DBA's and Developers book published by APRESS, write that tests performed by Oracle showed an increase in performance of up to 20 times when using native SQL.

There is only one startup parameter that affects the compilation mode of new PL/SQL programs. This parameter is named plsql_code_type and its value can be either 'NATIVE' or 'INTERPRETED'. So doing an :

SQL> alter system set plsql_code_type = 'NATIVE' scope=both;

System altered.

SQL> 

... will effect all new PL/SQL programs that will be created or compiled from this point on. Switching the entire database to use native PL/SQL is a bit more complicated and is performed by following these steps :

  1. Shutdown the database.
  2. Start it up again in upgrade more. (startup upgrade)
  3. Run the $ORACLE_HOME/rdbms/admin/dbmsupgnv.sql script. This will set the execution mode of all database PL/SQL code blocks to native.
  4. Shutdown the database and start it up again in normal mode.
  5. Run the $ORACLE_HOME/rdbms/admin/utlrp.sql script to recompile all invalid PL/SQL code units.

Be advised that the last step may take a considerable amount of time, depending on the number of PL/SQL objects in your database. Oracle provides the following query to test the number of objects left to be compiled.

SQL>  SELECT COUNT(*) FROM obj$ WHERE status IN (4, 5, 6);

  COUNT(*)
----------
      2055

SQL> r   
  1*  SELECT COUNT(*) FROM obj$ WHERE status IN (4, 5, 6)

  COUNT(*)
----------
      2005

SQL> r
  1*  SELECT COUNT(*) FROM obj$ WHERE status IN (4, 5, 6)

  COUNT(*)
----------
      1109

SQL>

One last thing. The process can be reversed, by following the steps above but instead of running dbmsupgnv.sql, run the dbmsupgin.sql also located in $ORACLE_HOME/rdbms/bin.

Tuesday 7 April 2009

Linux: Getting passed rsync's most notorious error messages and determining whether a shell is interactive or not.

While trying to back up my personal data using rsync -aruvzh --delete /home/thanassis/jdevhome/ thanassis@192.168.1.68:/home/thanassis/jdevhome I run into the following error message.

protocol version mismatch - is your shell clean?
(see the rsync man page for an explanation)
rsync error: protocol incompatibility (code 2) at compat.c(69)

A little googling and a final look at the rsync manual revealed that :

DIAGNOSTICS
     rsync occasionally produces error messages that may seem a little cryp-
     tic.  The  one that seems to cause the most confusion is “protocol ver-
     sion mismatch — is your shell clean?”.

     This message is usually caused by your startup scripts or remote  shell
     facility  producing  unwanted garbage on the stream that rsync is using
     for its transport. The way to diagnose this  problem  is  to  run  your
     remote shell like this:

            ssh remotehost /bin/true > out.dat

     then  look  at out.dat. If everything is working correctly then out.dat
     should be a zero length file. If you are getting the above  error  from
     rsync  then  you  will probably find that out.dat contains some text or
     data. Look at the contents and try to work out what  is  producing  it.
     The  most  common cause is incorrectly configured shell startup scripts
     (such as .cshrc or .profile) that contain output  statements  for  non-
     interactive logins.

Needless to say that fortune was the one to blame. My .bashrc file had the following last statements since the days of SuSE 8.2 and although I am now using a completely different distro, I still refuse to get them out of my startup files.

# Something to remember the old SuSE days
if [ -x /usr/bin/fortune ] ; then
    echo
    /usr/bin/fortune
    echo
fi

So, the solution would be to display a fortune cookie only when the current shell is interactive and then it was time for the Bash Reference Manual to come to our rescue. Their answers are straightforward :

To determine within a startup script whether Bash is running interactively or not, examine the variable $PS1; it is unset in non-interactive shells, and set in interactive shells. Thus:
     if [ -z "$PS1" ]; then
        echo This shell is not interactive
     else
        echo This shell is interactive
     fi
Alternatively, startup scripts may test the value of the `-' special parameter. It contains i when the shell is interactive. For example:
     case "$-" in
     *i*)  echo This shell is interactive ;;
     *)    echo This shell is not interactive ;;
     esac

In my case I wanted to run fortune on interactive shells only. So again I modified my bashrc file to look like :

# Display a fortune cookie on interactive logins only
if [ -n "$PS1" ]; then
        # Some people don't like fortune. If you uncomment the following lines,
        # you will have a fortune each time you log in ;-)
        if [ -x /usr/bin/fortune ] ; then
                echo
                /usr/bin/fortune
                echo
        fi
fi

... and that did it.

Friday 27 March 2009

JDevelopr 10g to 11g. It's a long way to migration

Today i tried migrating a simple project from JDeveloper 10g (10.1.3.4) to 11g (11.1.1.0.1) )and the results are mostly disappointing.

A picture is a thousand words.

Migration Results
Browse Page
Search Page
This is how the application looks today. ... and here is how it ended up after migration......

Just for the shake of complicity, I have to report the following :

  • Migration finished without any exceptions being thrown at the console. The only warning message that appears when opening the project is :
    Mar 30, 2009 9:43:18 AM oracle.jdevimpl.webapp.taglib.JDevTaglibUtils _parseFail
    WARNING: Invalid TLD Location, TldUtils parse failed for URL : jar:file:/home/oracle/jdeveloper/mywork/AS400-Materials/ViewController/opt/oracle/Middleware/jdeveloper/jlib/adf-faces-databinding-rt.jar!/META-INF/databinding.tld
        
  • Although attribute labels are not shown in the search page, the Attribute properties page displays them correctly.
  • The initial JSF navigation diagram, does not display any graphic, despite the fact that I see no error ether on the message window or the console.

I feel like I want to complain to somebody, but I am not sure to whom.

Monday 23 March 2009

Linux: Mind your labels

I had seen labels used in /etc/fstab and /boot/grub/grub.conf but never quite got the hung of them, until I read page 170 of Tammy Fox's Red Hat Enterprise Linux 5 Administration Unleashed.

So what I got out of this, was that labels may be listed in place of partitions and while they are not required, they may become useful when a partition number changes, when moving the partition or repartitioning the drive.

The command to use for changing or displaying a partition's label is e2label. The command must be run as root and the syntax is as simple as :

e2label device [newlabel

This sets label to device and if no label is provided, then the device's label is displayed.

So far so good. Now the sad story begins when attempting to change the label of an existing partition of an already used drive, especially the one containing /boot.

When that happens remember to update both /etc/fstab and /boot/grub/grub.conf. Otherwise you risk not being able to boot your system next time. The default label used by the Anaconda installer is "\". So let's suppose that for some reason you decide to change this to CentOS-Root, by issuing something like :

[root@lxbakalidis ~]# e2label /dev/sda1 CentOS-Root

Next thing to do is check your /etc/fstab file and make sure that an entry like :

LABEL=CentOS-Root       /                       ext3    defaults        1 1

is really there and last but not least make sure that grab.conf line that starts your current kernel also references the new label like this:

title CentOS (2.6.18-92.1.22.el5)
        root (hd1,0)
        kernel /boot/vmlinuz-2.6.18-92.1.22.el5 ro root=LABEL=CentOS-Root rhgb quiet 
        initrd /boot/initrd-2.6.18-92.1.22.el5.img

Failure to do this right will probably halt your kernel with messages like :

mount: could not find filesystem '/dev/root'
setuproot: moving /dev failed: No such file or directory
setuproot: error mounting /proc: No such file or directory
setuproot: error mounting /sys: No such file or directory
switchroot: mount failed: No such file or directory
Kernel panic - not syncing: Attempted to kill init!

... and you will probably need a live CD to fix it. For more information refer to the following thread at LinuxQustions.org.

PS: Now I am sure that the last fortune cookie I saw before the crush read something like Good judgement comes from experience, experience comes from bad judgement. but I was too preoccupied with the coming Friday night joys to take it seriously.

Friday 13 February 2009

Linux : Creating virtual disks from .iso files

Just picked this up from the fedora guide and and thought I might put it here for reference.

Suppose you have a .ISO file whose contents you wish to examine or even need to copy some data out of. The fedora-guide suggests the following approach.

mkdir ~/your_disc/
su -c 'mount file.iso ~/your_disc -t iso9660 -o loop'

then to unmount it

su -c 'umount ~/your_disc/'

Thursday 5 February 2009

RealPlayer for 64 bit Linux

This is quick note to myself as I keep forgetting it.

The location to download latest nightly builds for RealPlayer that includes a x86_64 version for Linux is here.

For x86_64 Linux choose the version tagged linux-2.6-glibc23-amd64.

Thursday 8 January 2009

Linux: Getting past the "BIOS doesn't leave a aperture memory hole" error or "How to enable the IOMMU option in the BIOS setup" . Part 2

After yesterdays post regarding the BIOS doesn't leave a aperture memory hole issue, I got a very logical question that I forgot to ask myself as I was too happy to see the error message go away.

Quirinius said:

But did that boot option actually give you more memory? Did you check with "free -m"?

So I did a little bit of testing. Here is the output of the free command before the using boot-options on the CentOS machine.


  total       used       free     shared    buffers     cached
Mem:       4048440     804072    3244368          0      34324     428640
-/+ buffers/cache:     341108    3707332
Swap:      4200988          0    4200988
      
  total       used       free     shared    buffers     cached
Mem:          3953        785       3168          0         33        418
-/+ buffers/cache:        333       3620
Swap:         4102          0       4102
    

and here is after :


  total       used       free     shared    buffers     cached
Mem:       4048024     553232    3494792          0      30792     336400
-/+ buffers/cache:     186040    3861984
Swap:      4200988          0    4200988
      
  total       used       free     shared    buffers     cached
Mem:          3953        536       3416          0         30        328
-/+ buffers/cache:        177       3775
Swap:         4102          0       4102
    

I have also checked what is happening on my notebook which also has 4GB of RAM memory but unlike the rest of my machines does not have an AMD processor or an Asus Motherboard with Phoenix BIOS and here is what free had to say.


  total       used       free     shared    buffers     cached
Mem:       4059392     652816    3406576          0      13048     206600
-/+ buffers/cache:     433168    3626224
Swap:      2096472          0    2096472
      
  total       used       free     shared    buffers     cached
Mem:          3964        637       3326          0         12        201
-/+ buffers/cache:        423       3541
Swap:         2047          0       2047
    

Doing a little bit of math shows that ...

      [thanassis@lxbakalidis ~]$ expr 4048024 - 4048440
      -416
    

After the boot option is set our memory decreases by 416 bytes and the memory reported by Fedora on a system that does not display the IOMMU error message at all is

      [thanassis@lxbakalidis ~]$ expr 4059392 - 4048440
      10952
    

... bytes bigger. Now I understand that I am comparing results from two different kernel versions, so I performed the same test at home on my AMD/Asus based Fedora box and here are my results..


[thanassis@plouton ~]$ cat fedora-home-before.txt 
             total       used       free     shared    buffers     cached
Mem:       4062232     490440    3571792          0      13816     177132
-/+ buffers/cache:     299492    3762740
Swap:            0          0          0
             total       used       free     shared    buffers     cached
Mem:          3967        479       3488          0         13        172
-/+ buffers/cache:        292       3674
Swap:            0          0          0
[thanassis@plouton ~]$ cat fedora-home-after.txt 
             total       used       free     shared    buffers     cached
Mem:       4061820    1083232    2978588          0      34960     393808
-/+ buffers/cache:     654464    3407356
Swap:            0          0          0
             total       used       free     shared    buffers     cached
Mem:          3966       1055       2910          0         34        384
-/+ buffers/cache:        636       3329
Swap:            0          0          0
[thanassis@plouton ~]$ expr 4061820 - 4062232
-412
[thanassis@plouton ~]$ 
    

Addendum

This is only a closing statement to admit that I managed nothing. I tried changing my graphics adapter with a new NVIDIA using the new kernel updates and my CentOS machine just froze again.

So I switched everything back, got my 416 bytes back and try to keep an eye on the net and the forums in case I somehow find something to help me this.... :-(

Tuesday 6 January 2009

Linux: Getting past the "BIOS doesn't leave a aperture memory hole" error or "How to enable the IOMMU option in the BIOS setup" .

This had been a major "To Do" item for me during the last year and I have tried many times to fix it, but today it seems I got lucky.

I had been seeing this on my CentOS workstation dmesg output, since the first day I installed it, approximately one year ago.


Checking aperture...
CPU 0: aperture @ 14000000 size 32 MB
Aperture too small (32 MB)
No AGP bridge found
Your BIOS doesn't leave a aperture memory hole
Please enable the IOMMU option in the BIOS setup
This costs you 64 MB of RAM

At first I thought it was nothing serious, and I tried to fix my graphics card that would not work with the NVidia provided drivers freezing the entire graphics system each time I would install them and tried to start X. I failed that too and replaced the graphics card with one from ATI. The new card appeared to work more satisfactory, but it would also hung if I tried to load the custom drivers provided by the vendor.

When I installed Feodra 9 at home, I saw the exact same error message but my GeForce 9600 NVidia appeared to work correctly so I dropped it. Then came Fedora 10 and there we were again. At the same time I began to get tired by the sluggish performance of my CentOS graphics and decided to try once again.

But his time I was lucky : jbkt23 provided the solution at the Fedora Forums. I am only copying it here just to help others who google for it come up with one much match.

Put it simply, the solution is to add the iommu=noaperture kernel boot parameter on your grub.conf file.

In more words, you need to edit the grub configuration file located in /boot/grub/grub.conf and locate the line that boots the current kernel. On my Fedora system the line looks like this :


title Fedora (2.6.27.9-159.fc10.x86_64)
        root (hd0,0)
        kernel /boot/vmlinuz-2.6.27.9-159.fc10.x86_64 ro root=UUID=8a9d59ee-c401-41bf-a4e6-8fdd97
067215 rhgb quiet iommu=noaperture
        initrd /boot/initrd-2.6.27.9-159.fc10.x86_64.img

All I needed was to add the bolded text at the end of the kernel line. Then a reboot and as MSK61 from the Fedora forum put it: Thanks, jbkt23. Worked like a charm.

The same solution worked for the CentOS 5.2 machine at work. There is more to it however. After getting rid of the IOMMU error, I tried to enable the 3D driver for my ATI Radeon X1300. At some point it worked. After the first reboot however, things went back to their normal not working state so I had to switch back to the standard driver.

Tomorrow I will try an NVidia card that was also not working and see how it goes.